Fly Fishing 101
The 5 Fly Fishing Knots You Actually Need
 Daniel Bowman
Updated June 20, 2026
16 min read
Daniel Bowman
Updated June 20, 2026
16 min read

Five knots will carry you through 95% of your fly fishing — the improved clinch, the surgeon's knot, the loop-to-loop connection, the nail knot, and the non-slip loop knot. Most anglers waste their first season memorizing a dozen knots they'll never use. You don't need a dozen. You need five reliable ones tied well, in the dark, with cold hands.
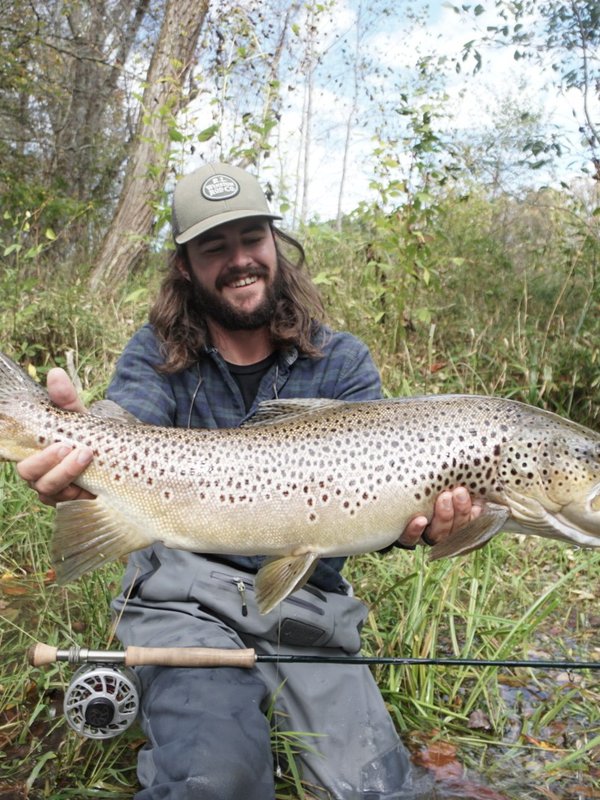
I've guided North Georgia trout water for over twenty years, and the knot that fails on the water is almost never the wrong knot — it's the right knot tied sloppy. A clinch knot that breaks at the eye usually broke because it wasn't lubricated before it was cinched. A tippet connection that pulls apart was almost always under-wrapped or seated dry. Learn five knots correctly and you eliminate the single most common reason beginners lose fish: gear failure at the worst possible moment.
The short version
The only five fly fishing knots you actually need are the improved clinch knot (fly to tippet), the surgeon's knot (tippet to leader, or two lines of similar diameter), the loop-to-loop connection (leader to fly line), the nail knot (fly line to leader butt, or backing to fly line), and the non-slip loop knot (fly to tippet when you want extra action). Lubricate every knot with saliva before cinching, seat it slowly with steady pressure, and trim the tag end close. Master these five and you can rig a rod, replace broken tippet streamside, and swap flies all day without ever needing a sixth knot.
Why do you only need 5 fly fishing knots?
You only need five fly fishing knots because the connections in a fly fishing setup repeat predictably, and each junction has one knot that does the job better than the alternatives. A fly rig is really just four or five connection points strung together: backing to fly line, fly line to leader, leader to tippet, and tippet to fly. There's a sixth situation — when you want a fly to swing freely instead of riding rigid — and that's the only place the loop knot earns its keep.
The fly fishing world has invented hundreds of knots, and YouTube will happily bury you in them. Resist it. Knot redundancy is how beginners end up frozen on the bank, half-remembering three different ways to attach a fly while the hatch comes off without them. A guide who's been doing this for decades uses the same handful of knots every single day, thousands of times a season. The repetition is the point. When you tie the same five knots over and over, your hands learn them, and you can re-rig in failing light without thinking — which is exactly when the best fish in the river decide to eat.
Here's the full rig, top to bottom, with the knot that handles each junction:
| Connection point | Knot to use | How often you'll tie it |
|---|---|---|
| Backing → fly line | Nail knot (or Albright) | Once per reel setup |
| Fly line → leader butt | Nail knot or loop-to-loop | Rarely; once per leader |
| Leader → tippet | Surgeon's knot or blood knot | Several times per trip |
| Tippet → fly | Improved clinch knot | Constantly — every fly change |
| Tippet → fly (free swing) | Non-slip loop knot | Situational, streamers & big dries |
Notice how lopsided the frequency column is. You'll tie an improved clinch knot fifty times for every nail knot. That's why beginners should drill the clinch and the surgeon's first — those two alone cover the connections you make and re-make all day on the water. The others you'll tie occasionally, and there's no shame in keeping a printed cheat sheet in your pack for the rare ones. Resources like the Orvis knot-tying guides walk through these same junction-by-junction connections, so it's worth a read if you want a second voice on the rig before a trip.
If the terms "leader," "tippet," and "butt section" are fuzzy, read our breakdown of leaders and tippet explained before you go further — knowing what each part of the system does makes the knots make sense.
How do you tie the improved clinch knot?
The improved clinch knot attaches your fly to the tippet, and it's the single most-used knot in fly fishing — you'll tie it every time you change flies. It holds roughly 95% of the line's breaking strength when tied correctly, which is plenty for trout. Here's the step-by-step:
- Thread the tippet through the hook eye. Pull about six inches of tag end through so you have room to work.
- Wrap the tag end around the standing line 5 times. Five wraps for tippet in the 4X–6X range; drop to 4 wraps for heavier 2X–3X material, which is stiffer and harder to seat.
- Pass the tag end back through the small loop formed just above the hook eye.
- Now make it "improved" — pass the tag end through the big loop you just created. This second pass is what separates the improved clinch from the basic clinch, and it dramatically reduces slippage.
- Lubricate the knot. Touch it to your lips — saliva is the universal streamside lubricant. Dry mono cinched tight generates friction heat that weakens the line right at the knot.
- Cinch slowly and evenly. Hold the fly with one hand, pull the standing line with the other, and let the wraps gather snug against the eye. Pull steady, not in a jerk.
- Trim the tag end close to the knot — leave a hair, not a stub.
The two failure points beginners hit: skipping the lubrication (heat-weakened line snaps at the eye on the hookset), and skipping the second loop pass (a plain clinch slips more often). Do both, every time. If your clinch keeps breaking when a fish runs, it's almost never the knot design — it's one of those two shortcuts. A solid clinch isn't just about landing more fish; it's about landing them faster, which matters on the wild trout streams that conservation groups like the Theodore Roosevelt Conservation Partnership work to protect — a fish that breaks off trailing a fly fares worse than one you bring in clean and release quickly.
How do you tie the surgeon's knot?
The surgeon's knot joins two lines of similar diameter — almost always your tippet to the end of your leader — and it's the easiest reliable line-to-line knot for cold or clumsy hands. Unlike the blood knot, it doesn't require precise counter-wrapping, so it's the one I teach every beginner first for tippet connections.
- Overlap the two lines so they run parallel and pointing in opposite directions, with about four inches of overlap.
- Form a simple loop with the overlapped section.
- Pass both the tippet and the tag end through that loop twice (this is a double surgeon's). For extra security with very fine tippet, pass through a third time — a triple surgeon's.
- Wet the knot.
- Pull all four strands at once — both standing lines and both tag ends — to seat it. Pulling all four evenly is what makes the surgeon's seat square instead of cocking sideways.
- Trim both tag ends.
The surgeon's knot is bulkier than a blood knot, which matters if you're a purist throwing tiny dries on glassy water — the small bump can catch in guides or land with a faint plink. For 99% of North Georgia trout fishing, that bulk is irrelevant and the speed advantage wins. When you're standing in the river at dusk and you've just snapped off on a low-hanging hemlock, you want the knot you can tie by feel — and that's the surgeon's.
How do you tie the loop-to-loop connection?
The loop-to-loop connection joins your leader to your fly line using the welded loop on modern fly lines and a perfection loop on the leader butt — and it lets you swap an entire leader in about ten seconds without re-rigging. Almost every fly line sold today comes with a factory welded loop at the tip, and most tapered leaders come with a pre-tied loop. When both have loops, you don't tie a knot at all — you interlock them.
- Pass the leader loop through the fly line loop.
- Pass the entire leader — fly, tippet, the whole thing — back through its own loop.
- Pull both loops snug so they seat into a square "handshake" connection, not a girth hitch. A girth hitch (where one loop chokes across the other) creates a hinge that fails — make sure the two loops lie flat against each other like clasped hands.
- Tug-test it before you fish.
The one thing to get right: the handshake orientation. If you seat it wrong, the loops cross into that hinge and the connection can saw through itself. Seat it correctly and it's nearly indestructible and frictionless through the guides. If your leader didn't come with a loop, tie a perfection loop in the butt section — it's the cleanest in-line loop and lies straight, where a surgeon's loop tends to cock to one side.
How do you tie the nail knot?
The nail knot connects fly line to leader butt (or backing to fly line) in a smooth, streamlined wrap that slides through the guides without catching — it's the knot for the permanent junctions you rarely re-tie. You'll set it once when you build a leader system and forget about it. The name comes from the original method, which used an actual nail as a tool; today most anglers use a hollow tube, a nail-knot tool, or a small section of a hypodermic-style tube to make threading the tag end easier.
- Lay the fly line, the leader butt, and a small tube parallel to each other, with the leader tag end and fly line overlapping by a few inches.
- Wrap the leader butt around all three — fly line, tube, and itself — 6 to 8 times, working back over the wraps neatly.
- Pass the leader tag end back through the tube, alongside the fly line.
- Pull the tube out, leaving the tag end threaded through the wraps.
- Wet it, then pull both ends of the leader slowly to gather the wraps tight against the fly line.
- Trim the tag ends on both the leader and the fly line.
The nail knot is fiddly the first few times, which is exactly why most anglers tie it at the bench at home — not streamside. Honestly, if your fly line already has a welded loop, you can skip the nail knot entirely and use a loop-to-loop instead. The nail knot earns its place if you fish older lines without welded loops, or when you want the absolute lowest-profile connection for spooky fish in clear, slow water like the spring creeks around the Soque.
How do you tie the non-slip loop knot?
The non-slip loop knot (also called the Kreh loop, after Lefty Kreh) attaches a fly to the tippet with a small open loop instead of cinching tight against the eye — which lets the fly swing and wobble freely for more lifelike action. It's the situational fifth knot: you don't need it for most nymphing or small dries, but it transforms how a streamer swims and how a big foam hopper rides.
- Make an overhand knot in the tippet, a few inches from the end, but don't tighten it — leave the loop open.
- Pass the tag end through the hook eye, then back through that open overhand loop.
- Wrap the tag end around the standing line — 4 to 6 wraps for light tippet, fewer for heavy.
- Bring the tag end back through the overhand loop again, entering from the same side it exited.
- Wet it, then pull the standing line and tag end to seat the wraps and set your loop size — keep the loop small, just big enough to let the fly pivot.
- Trim the tag.
The payoff is action. A streamer tied with a fixed clinch knot rides stiff, with the leader holding its nose in line; a streamer on a loop knot darts, jigs, and turns like a wounded baitfish. The same logic applies to large dry flies and articulated patterns. The tradeoff is a small loss of strength versus a clinch, so I don't use it on 6X for tiny midges — but on 3X with a sculpin pattern, it's the knot that makes the fly come alive. If you're rigging up to swing streamers for the big browns the region is known for, this is the connection to learn after you've drilled the clinch.
Which knots should you learn first?
Learn the improved clinch knot and the surgeon's knot first — together they cover every connection you make and re-make on the water, which is the only knot work most anglers do all day. Drill those two until you can tie them blind. Then add the loop-to-loop (it's barely a knot), and finally the nail knot and loop knot when the situations call for them.
Here's the practical priority order, and roughly how long each takes to learn:
- Improved clinch knot — learn day one. Used every fly change. Master it before anything else.
- Surgeon's knot — learn day one. Used every tippet replacement. Forgiving with cold hands.
- Loop-to-loop — learn in five minutes. It's an interlock, not a tie. You'll use it whenever you swap leaders.
- Non-slip loop knot — learn week two, when you start fishing streamers and big dries and want better action.
- Nail knot — learn at the bench, anytime. You'll tie it rarely, and only for permanent junctions.
If you only have one evening before a trip, spend it on the clinch. A confident clinch knot is the difference between landing the fish of the day and watching your fly stay in its mouth as it swims off. It's worth more practice than every other knot combined. And once the fly is on solidly, the next thing that loses fish is a soft hookset — which is why a clean knot and a sharp hook set go hand in hand.
How do you keep knots from failing on the water?
Knots fail for a small number of repeatable reasons, and almost all of them come down to technique, not knot choice — fix these habits and your break-offs drop dramatically. A guide watches break-offs all season and the causes are remarkably consistent. Here's the checklist I run through with every client who's losing fish to gear failure:
- Always lubricate before cinching. Saliva, every knot, no exceptions. Dry friction heat is the number-one invisible knot killer.
- Seat the knot slowly. A smooth, steady pull lets the wraps gather correctly. A sharp jerk cocks the knot or burns the line.
- Check your tippet for wind knots. Those accidental overhand knots from a tailing loop cut tippet strength by half. Re-tie when you find one — don't fish through it.
- Match tippet diameter to fly size with the "rule of 4." Divide the hook size by 4 to get a starting tippet X-size — a size 16 fly fishes well on 4X. Too-heavy tippet on a tiny fly kills the drift; too-light on a big fly snaps on the hookset. (Our leaders and tippet guide covers the X-system in full.)
- Retie after every fish, and after snagging the bottom. Abrasion weakens line invisibly. The fish you just landed nicked your tippet on a tooth; the next one breaks you off. A fresh knot costs thirty seconds.
- Inspect the eye. A burr or paint blob in the hook eye saws through tippet. Run the line through and feel for grit before you trust it.
- Trim tag ends close, but not flush. A stub catches algae and looks unnatural; cutting flush can let the knot creep. Leave a barely-visible nub.
The single biggest upgrade for most beginners isn't a fancier knot — it's the discipline to re-tie. Tippet is cheap; a lost trophy isn't. If you nymph heavily, where flies tick the bottom and tippet takes constant abrasion, re-tie even more often — our nymphing for trout guide explains why bottom-bouncing rigs eat tippet faster than dry-fly fishing.
What gear do you need to tie knots streamside?
You need surprisingly little to manage knots on the water — a good nipper, a pair of forceps, and floatant or a small tube of saliva substitute will cover everything. Don't over-buy. Here's the short list of what actually earns a spot on your lanyard or vest:
- Nippers — a sharp, dedicated line cutter. Nail clippers work in a pinch but dull fast on fluorocarbon and leave a ragged cut that's hard to thread through a tiny hook eye.
- Forceps / hemostats — for unhooking fish, but also indispensable for pulling tag ends snug and clearing eyes.
- A nail-knot tool or short tube — only if you tie nail knots streamside, which most people don't. Keep one at the bench.
- A magnifier or reading-strength clip-on — be honest about your eyes. Threading 6X through a size 20 eye in low light is the number-one reason anglers give up and go home early. Cheap fix.
- Tippet spools in 4X, 5X, and 6X — the workhorse range for North Georgia trout. Keep them on a tippet holder so you're not digging.
- A knot-tying card or laminated cheat sheet — no ego here. The nail knot and loop knot are easy to blank on, and a card in your pack saves the trip.
Everything else is optional. The expensive zinger-mounted gadgets are nice-to-haves; the nipper and your own saliva do 90% of the real knot work.
The honest take: when knots stop mattering
Here's something most "5 knots" articles won't tell you: on a guided trip, your knots are entirely the guide's problem. We rig your rod before you arrive, re-tie every break-off, swap flies as the water tells us to, and check your tippet for nicks all day — so a beginner who's never tied a clinch knot in their life can still land the best trout of the season on their first outing. The knots are part of the craft worth learning for its own sake, but they're never a barrier to actually catching fish with someone who knows the water.
That's the case for learning these five at home and then fishing a guided day or two while you build hours on the water. You get the satisfaction of a clean rig you tied yourself, plus a guide doing the heavy lifting at the junctions that matter while you focus on the cast, the drift, and the eat. North Georgia's tailwaters and spring creeks are demanding water — the Soque's wild browns and the Toccoa's selective rainbows reward good presentation, and there's no faster way to learn presentation than fishing beside someone who reads the river for a living. Once you've watched a guide re-tie a surgeon's by feel in failing light a few times, your own knots get a lot more confident.
Frequently Asked Questions
What is the strongest fly fishing knot for tying on a fly?
The improved clinch knot retains roughly 95% of the line's breaking strength when tied and lubricated correctly, which makes it the strongest practical choice for most trout fishing. For absolute maximum strength on heavier tippet, some anglers prefer the non-slip loop knot or a Trilene knot (a double-loop variant of the clinch), but the difference is marginal. The bigger strength factor is technique — a perfectly chosen knot tied dry and cinched in a jerk will fail before a humble clinch tied wet and seated slowly.
How many fly fishing knots do I really need to know?
You need five: the improved clinch (fly to tippet), the surgeon's knot (tippet to leader), the loop-to-loop connection (leader to fly line), the nail knot (fly line to leader butt or backing to line), and the non-slip loop knot (fly to tippet for free action). Of those, the clinch and the surgeon's cover everything you tie and re-tie on the water — the other three are situational and tied rarely. Most experienced guides use exactly this handful all season long.
What's the difference between a clinch knot and an improved clinch knot?
The improved clinch knot adds one extra step: after passing the tag end through the small loop above the hook eye, you pass it through the larger loop you just formed. That second pass locks the knot and dramatically reduces slippage, especially on slick fluorocarbon and lighter tippets. A plain clinch can slip free under a hard run; the improved version rarely does. There's no reason to tie the basic clinch — always make it improved.
Should I use a blood knot or a surgeon's knot for tippet?
For most anglers, the surgeon's knot is the better choice because it's faster, easier to tie with cold or clumsy hands, and nearly as strong as a blood knot. The blood knot is slimmer and slides through guides more cleanly, which matters for technical dry-fly fishing on glassy water, but it requires precise counter-wrapping that's hard to tie streamside. Learn the surgeon's first; add the blood knot later if you fish a lot of small dries on flat water.
Why does my fly keep breaking off at the knot?
The two most common causes are tying the knot dry (friction heat weakens the line right at the cinch) and not seating it slowly. Always wet the knot with saliva before tightening, and pull steady rather than jerking. Other culprits: a burr in the hook eye sawing the tippet, an undetected wind knot in your tippet cutting its strength in half, or tippet that's too light for the fly and hookset. Re-tie after every fish and after every snag — abrasion weakens line invisibly.
Do I need different knots for fluorocarbon versus monofilament?
The same five knots work for both, but fluorocarbon is stiffer and slicker, so it benefits from extra care. Add a wrap to your clinch knot (six instead of five) and lubricate religiously, because fluorocarbon generates more friction heat and is less forgiving of a dry cinch. The surgeon's and loop knots both hold fine in fluoro. The one knot some anglers add specifically for fluorocarbon-to-mono connections is the double uni, but a triple surgeon's handles that junction well enough for trout fishing.
What's the easiest fly fishing knot to learn first?
The improved clinch knot is the easiest high-value knot to learn first, and it's also the one you'll use most — every time you change a fly. It's a straightforward wrap-and-tuck motion that becomes muscle memory within an evening of practice. Drill it at home with a piece of cord tied to a chair leg before your trip. The surgeon's knot is a close second and just as forgiving. Those two alone will get you fishing.
Do I have to know any knots to book a guided fly fishing trip?
No. On a guided North Georgia trip, your guide rigs your rod, re-ties every break-off, swaps flies, and checks your tippet all day — you don't need to know a single knot to fish or to catch fish. Learning the five core knots is satisfying and makes you more self-sufficient on solo outings, but it's never a prerequisite for a guided day. Many first-timers land the best trout of their lives without ever having tied a clinch knot. If you want a deeper reference, our guide to the fly fishing knots every angler should know covers the full set.
Want to skip the knot anxiety entirely?
On a guided North Georgia trip, your guide rigs everything and re-ties all day — you just fish. Use the trip finder to book.
Find Your Trip or Find Your Trip →